Images and videos
Images

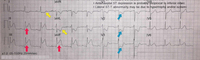


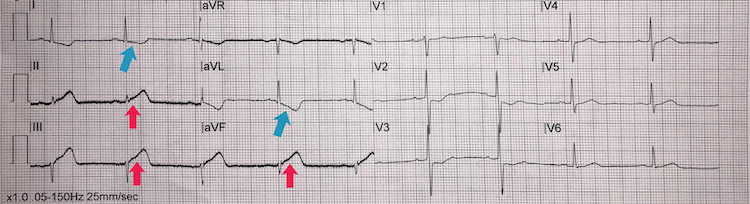
ST-elevation myocardial infarction
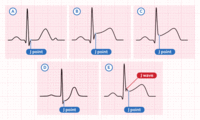
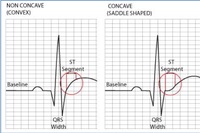
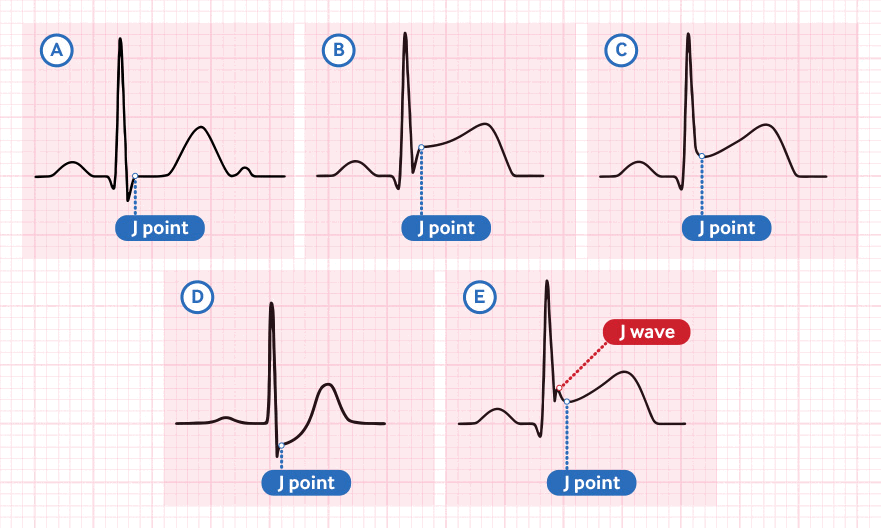
Identifying the J point on the ECG
Created by the BMJ Knowledge Centre
See this image in context in the following section/s:

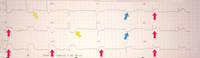
ST-elevation myocardial infarction
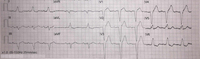
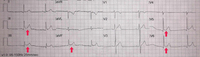
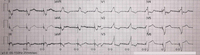
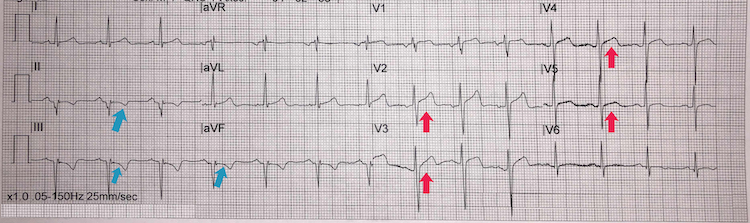
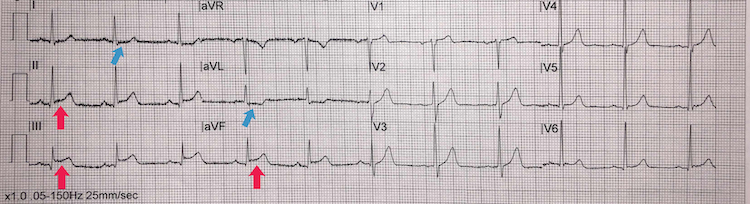
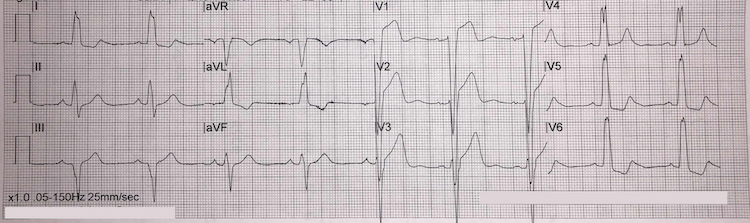
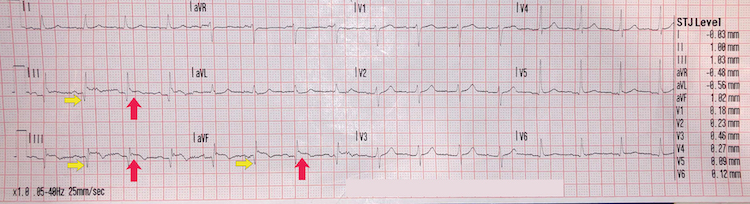
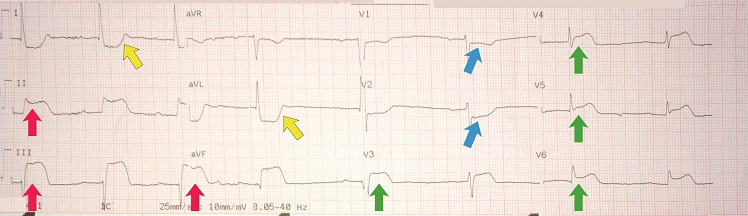
High lateral STEMI
From the personal collection of Dr Aung Myat (used with permission)
See this image in context in the following section/s:
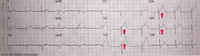
ST-elevation myocardial infarction
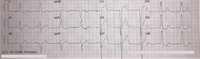
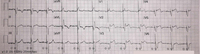
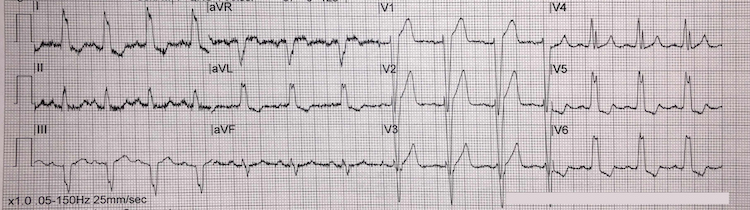
Anteroseptal STEMI example II
From the personal collection of Dr Aung Myat (used with permission)
See this image in context in the following section/s:

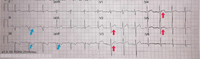
ST-elevation myocardial infarction
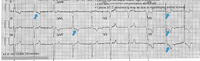
Anterior STEMI
From the personal collection of Dr Aung Myat (used with permission)
See this image in context in the following section/s:
ST-elevation myocardial infarction
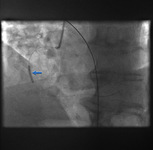
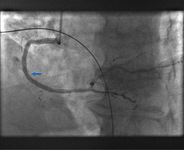
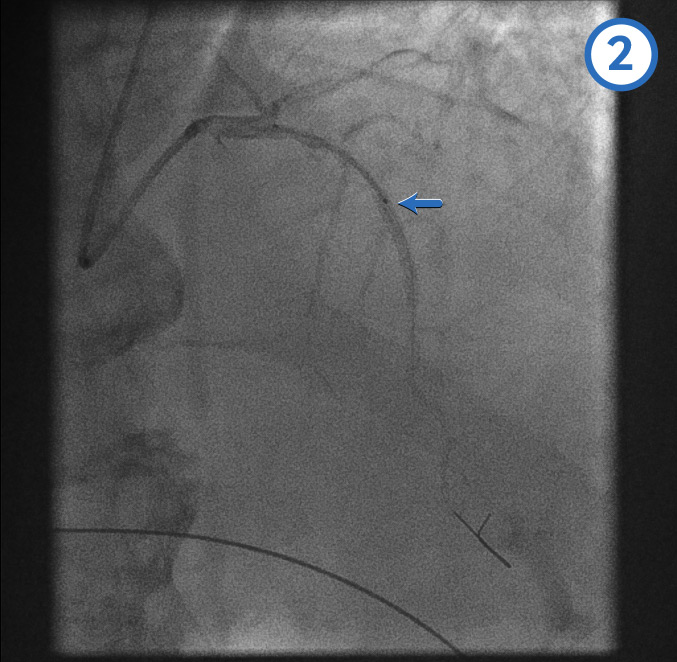
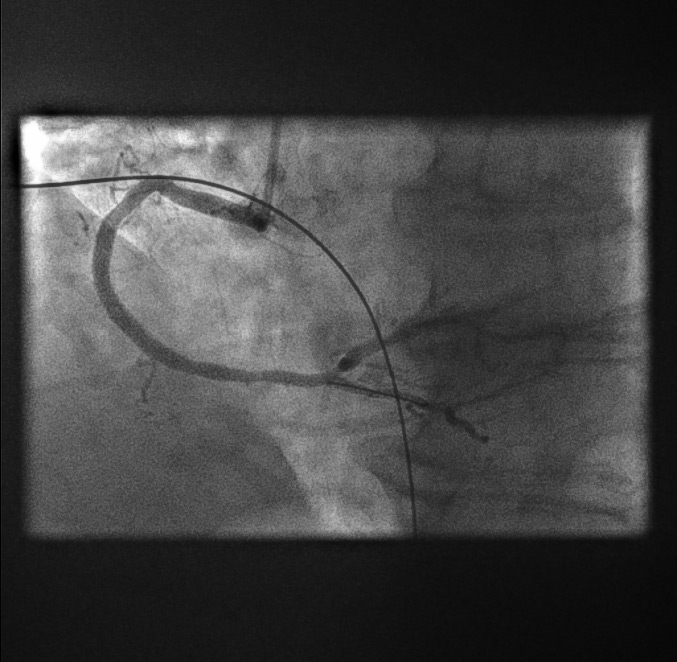
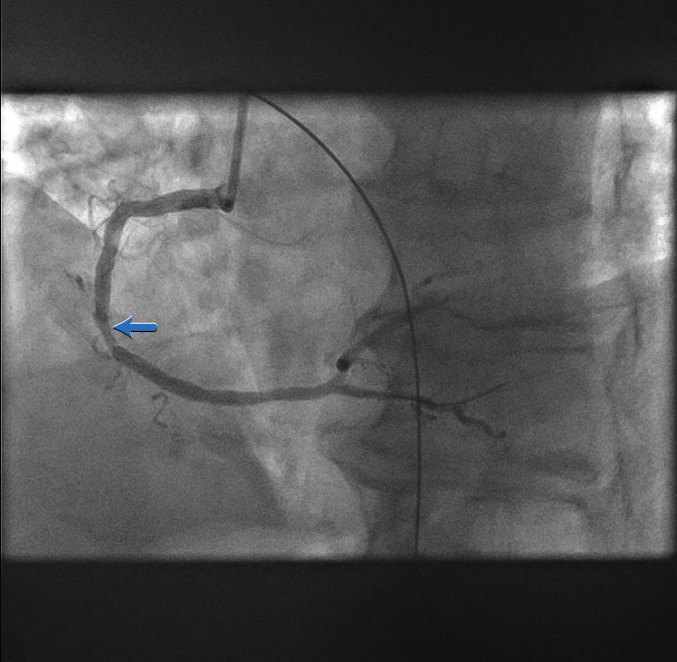
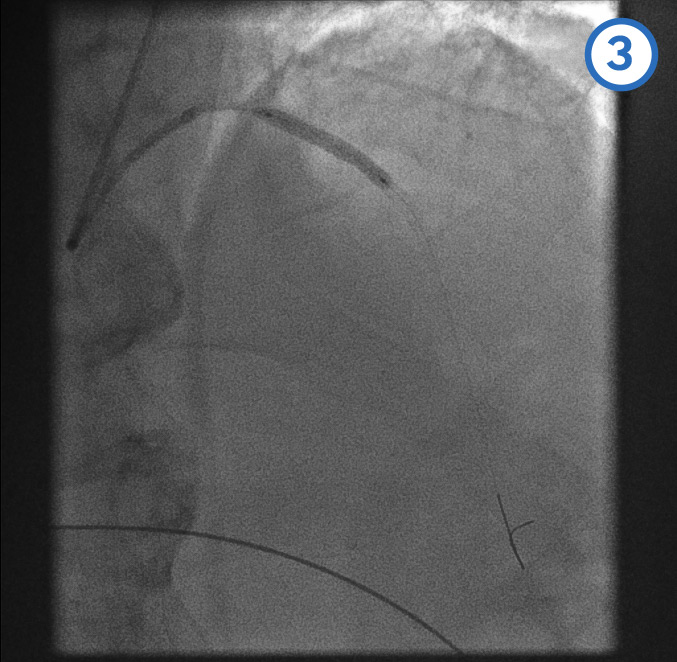
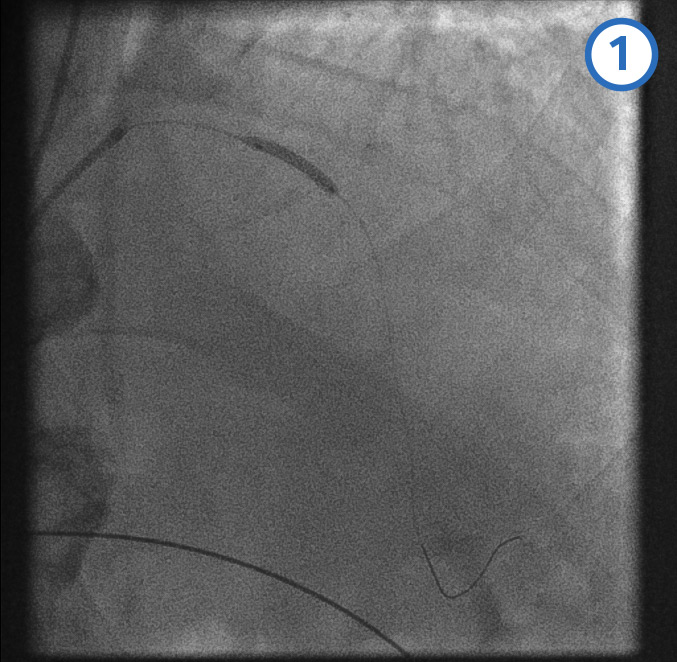
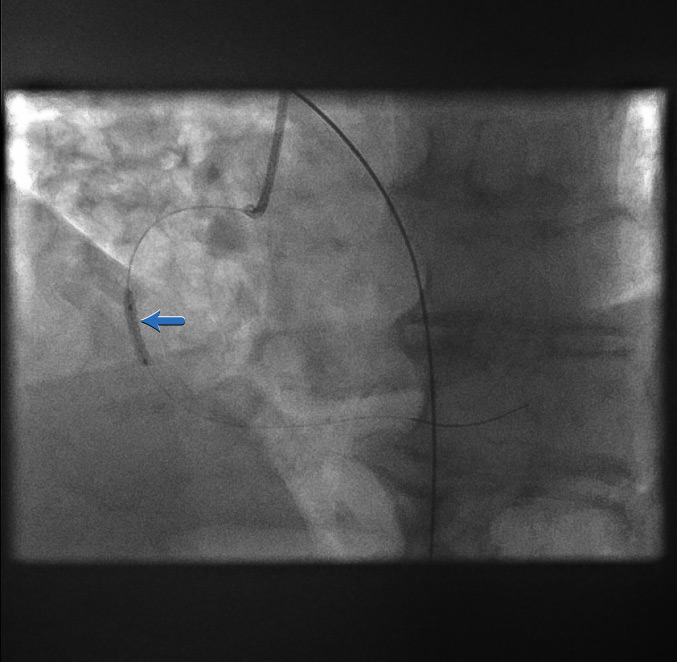
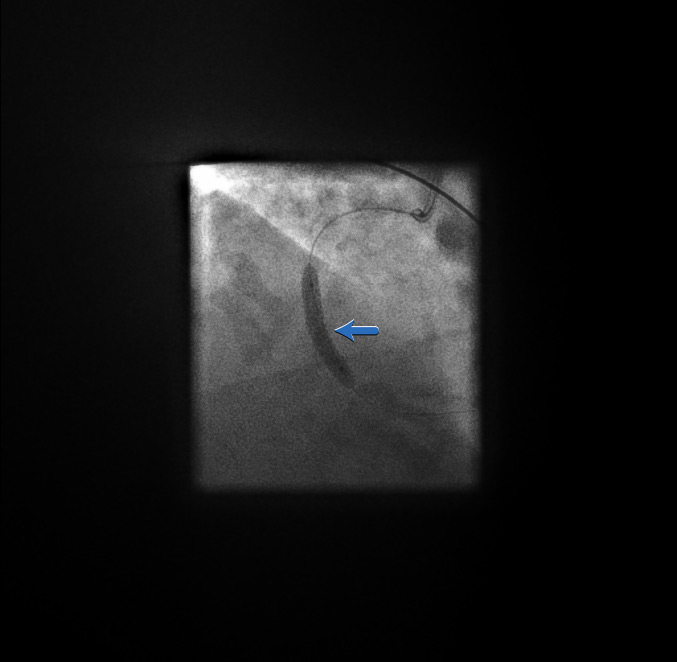
Proximal LAD stent deployment image 2 - proximal stent is positioned with the distal marker (blue arrow) overlapping/within the proximal end of the previously deployed mid-LAD stent
From the personal collection of Dr Aung Myat (used with permission)
See this image in context in the following section/s:
ST-elevation myocardial infarction
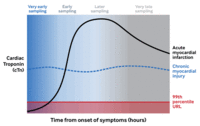
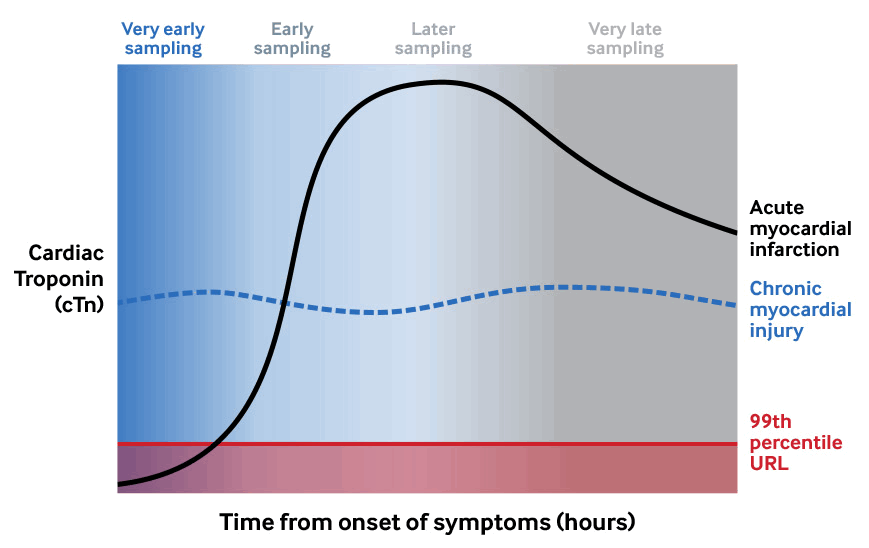
Cardiac troponin kinetics after acute myocardial injury including acute MI
Created by the BMJ Knowledge Centre
See this image in context in the following section/s:
ST-elevation myocardial infarction
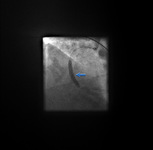
Mid-LAD artery stent deployment image 2 - stent balloon inflated
From the personal collection of Dr Aung Myat (used with permission)
See this image in context in the following section/s:
ST-elevation myocardial infarction
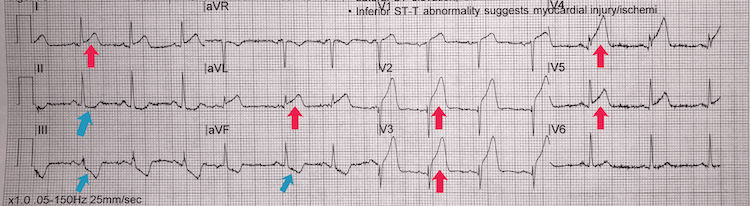
Inferior STEMI example I
From the personal collection of Dr Aung Myat (used with permission)
See this image in context in the following section/s:
ST-elevation myocardial infarction
Left ventricular hypertrophy example II
From the personal collection of Dr Aung Myat (used with permission)
See this image in context in the following section/s:
ST-elevation myocardial infarction
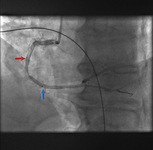
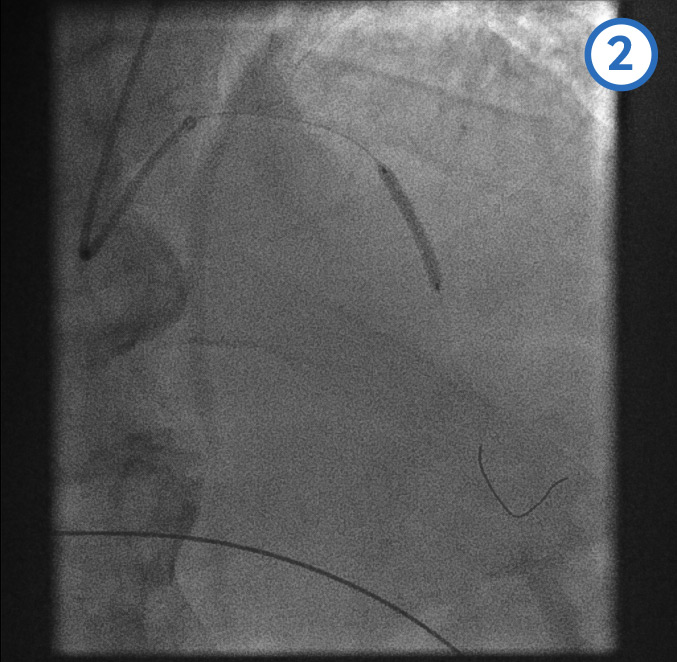
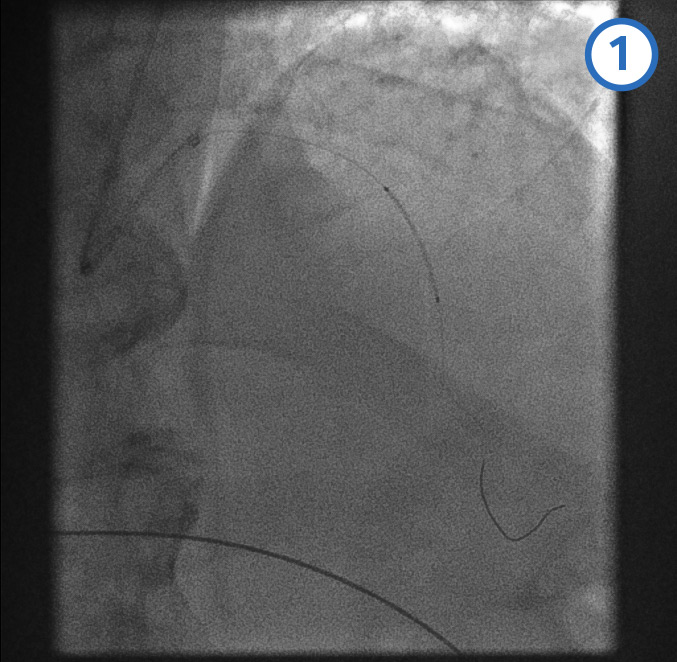
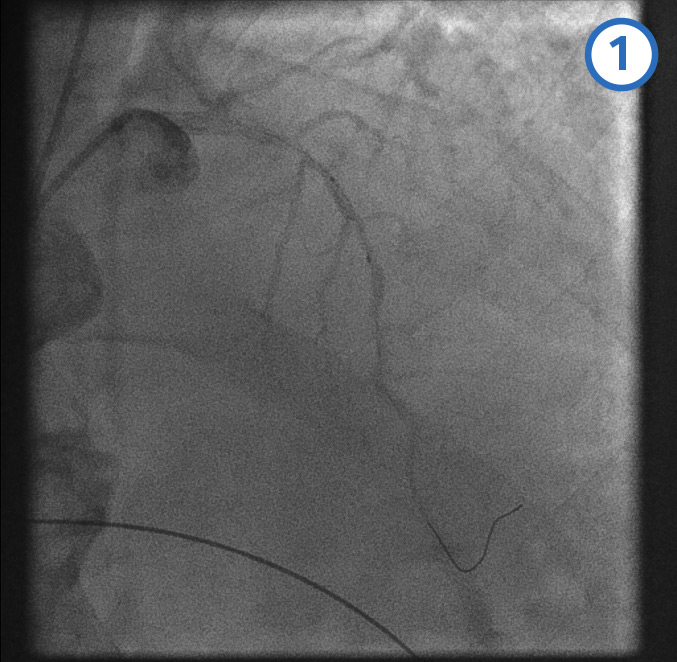
Coronary guidewire deployment
From the personal collection of Dr Aung Myat (used with permission)
See this image in context in the following section/s:

ST-elevation myocardial infarction
Left anterior descending artery pre-dilatation image 4
From the personal collection of Dr Aung Myat (used with permission)
See this image in context in the following section/s:
ST-elevation myocardial infarction
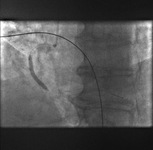
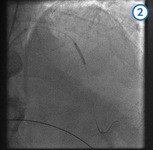
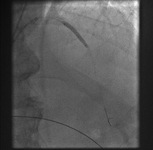
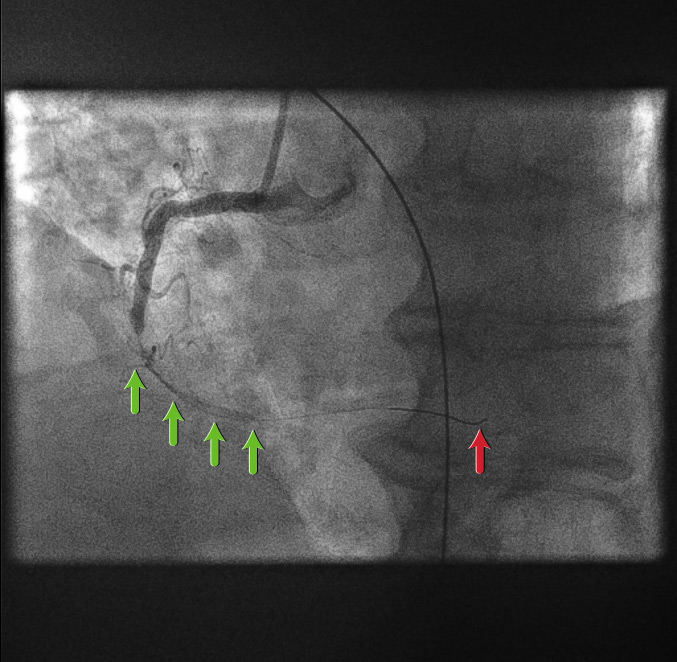
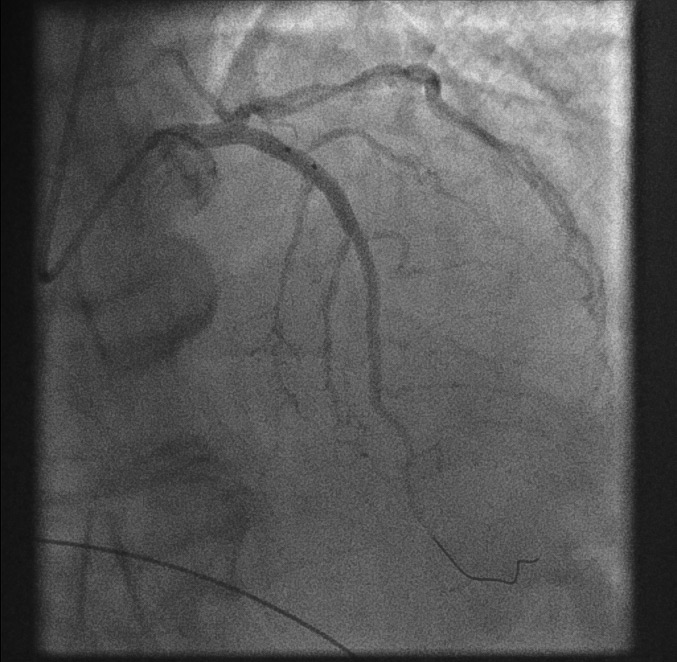
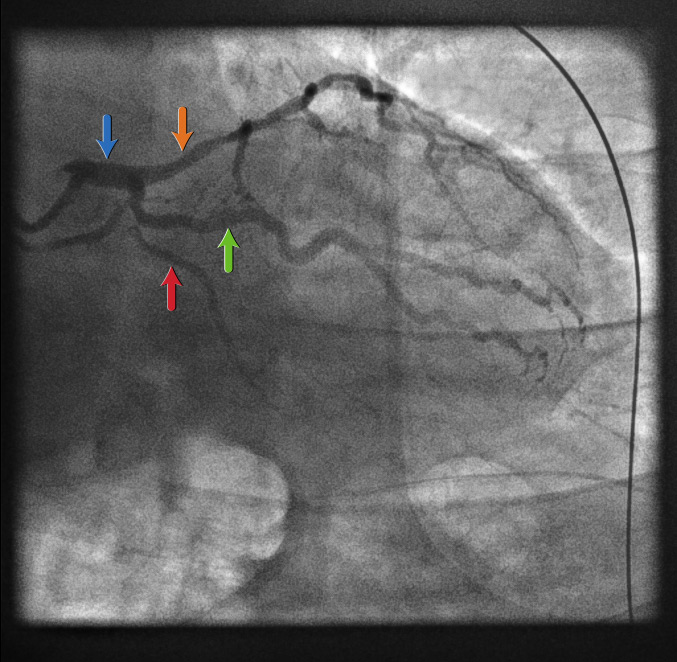
RCA primary angioplasty: final result
From the personal collection of Dr Aung Myat (used with permission)
See this image in context in the following section/s:

ST-elevation myocardial infarction
Paced rhythm example II
From the personal collection of Dr Aung Myat (used with permission)
See this image in context in the following section/s:

ST-elevation myocardial infarction
Final LAD stenting result: right anterior oblique cranial view
From the personal collection of Dr Aung Myat (used with permission)
See this image in context in the following section/s:
ST-elevation myocardial infarction
Restoration of coronary flow
From the personal collection of Dr Aung Myat (used with permission)
See this image in context in the following section/s:

ST-elevation myocardial infarction
Post-dilatation of overlapping stents
From the personal collection of Dr Aung Myat (used with permission)
See this image in context in the following section/s:
ST-elevation myocardial infarction
Final LAD stenting result: posterior anterior cranial view
From the personal collection of Dr Aung Myat (used with permission)
See this image in context in the following section/s:

ST-elevation myocardial infarction
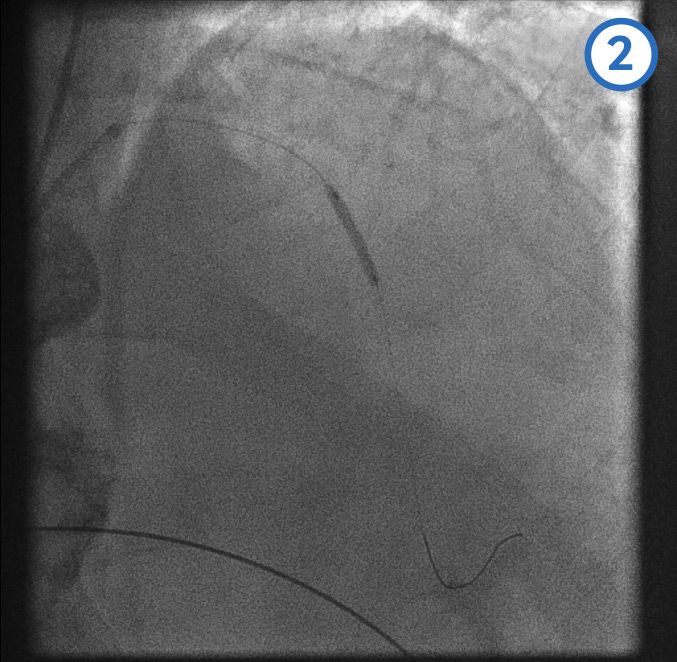
Stent deployed
From the personal collection of Dr Aung Myat (used with permission)
See this image in context in the following section/s:
ST-elevation myocardial infarction
Inferior STEMI example II
From the personal collection of Dr Aung Myat (used with permission)
See this image in context in the following section/s:

ST-elevation myocardial infarction
Left anterior descending artery pre-dilatation image 3
From the personal collection of Dr Aung Myat (used with permission)
See this image in context in the following section/s:
ST-elevation myocardial infarction
Proximal LAD stent deployment image 3 - proximal stent deployed
From the personal collection of Dr Aung Myat (used with permission)
See this image in context in the following section/s:
ST-elevation myocardial infarction
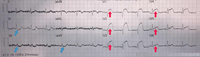
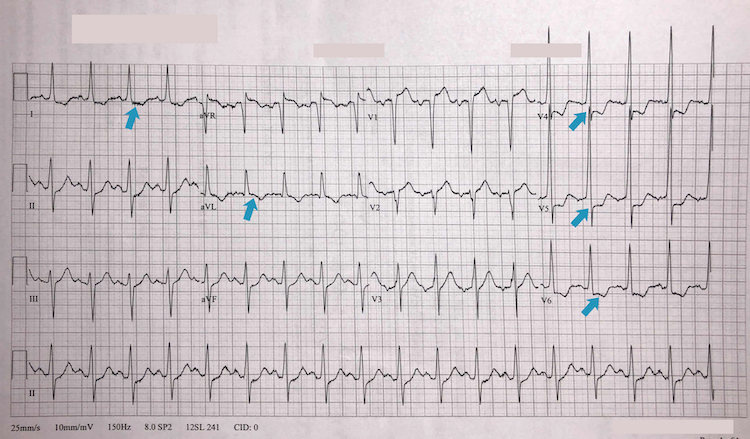
Left bundle branch block example I
From the personal collection of Dr Aung Myat (used with permission)
See this image in context in the following section/s:
ST-elevation myocardial infarction
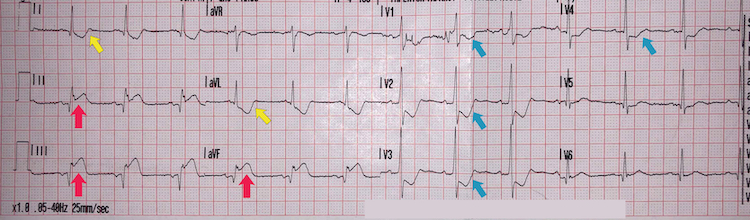
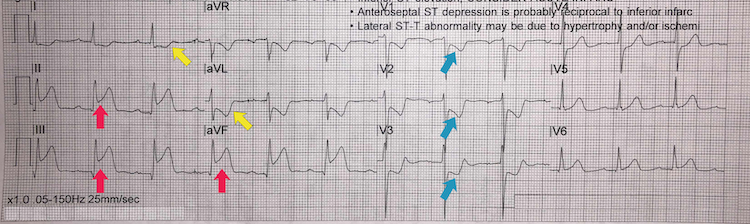
Inferoposterolateral STEMI example I
From the personal collection of Dr Aung Myat (used with permission)
See this image in context in the following section/s:

ST-elevation myocardial infarction
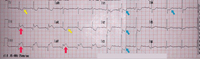
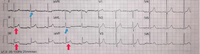
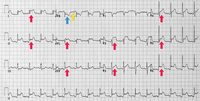
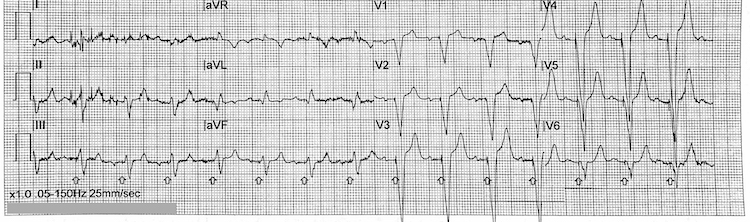
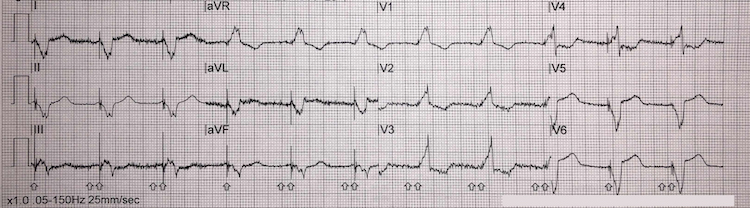
Possible’ inferolateral STEMI
From the personal collection of Dr Aung Myat (used with permission)
See this image in context in the following section/s:

ST-elevation myocardial infarction
Acute pericarditis
From the personal collection of Dr Aung Myat (used with permission)
See this image in context in the following section/s:
ST-elevation myocardial infarction
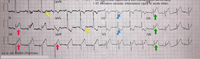
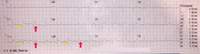
Possible’ inferolateral STEMI: ST-segment shift
Created by the BMJ Knowledge Centre
See this image in context in the following section/s:

ST-elevation myocardial infarction
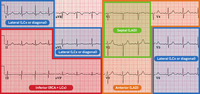
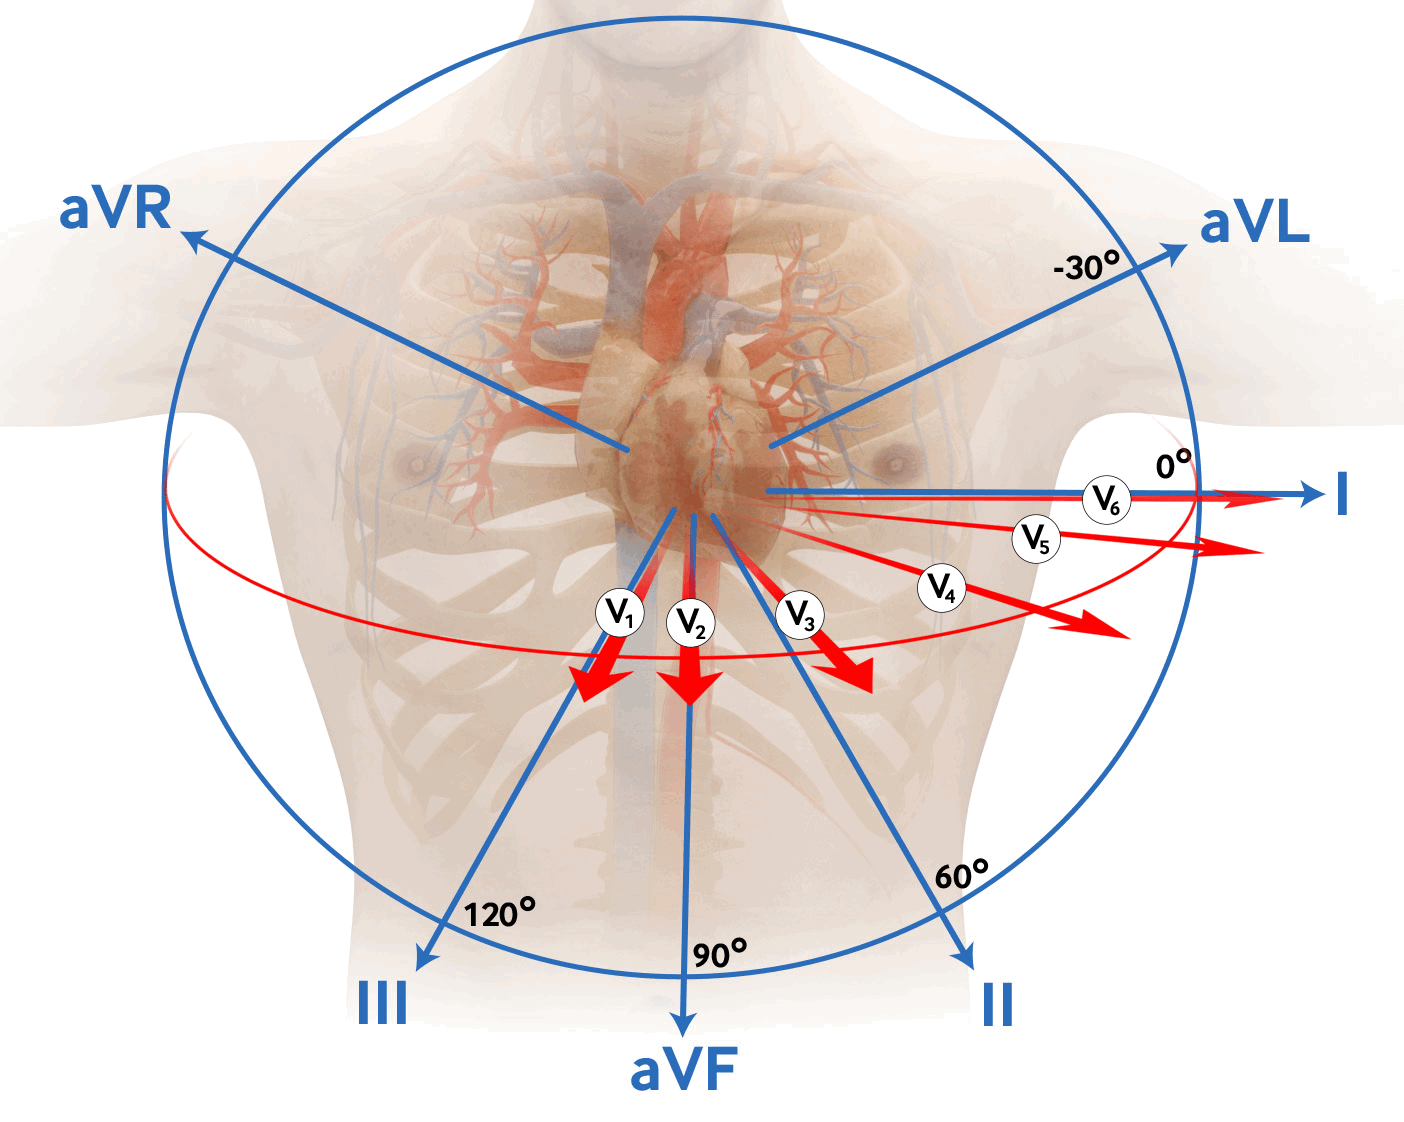
Coronary anatomy and ECG leads
Created by the BMJ Knowledge Centre
See this image in context in the following section/s:

ST-elevation myocardial infarction
Stent positioning
From the personal collection of Dr Aung Myat (used with permission)
See this image in context in the following section/s:

ST-elevation myocardial infarction
Mid-LAD artery stent deployment image 3 - post mid-LAD stent deployed
From the personal collection of Dr Aung Myat (used with permission)
See this image in context in the following section/s:
ST-elevation myocardial infarction
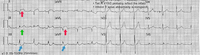
Left bundle branch block example III
From the personal collection of Dr Aung Myat (used with permission)
See this image in context in the following section/s:
ST-elevation myocardial infarction
Paced rhythm example III
From the personal collection of Dr Aung Myat (used with permission)
See this image in context in the following section/s:
ST-elevation myocardial infarction
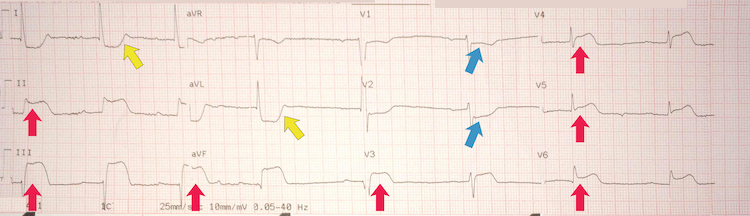
Inferoposterior STEMI example I
From the personal collection of Dr Aung Myat (used with permission)
See this image in context in the following section/s:
ST-elevation myocardial infarction
Mid-LAD artery stent deployment image 1 - stent positioned in the mid-LAD artery
From the personal collection of Dr Aung Myat (used with permission)
See this image in context in the following section/s:
ST-elevation myocardial infarction
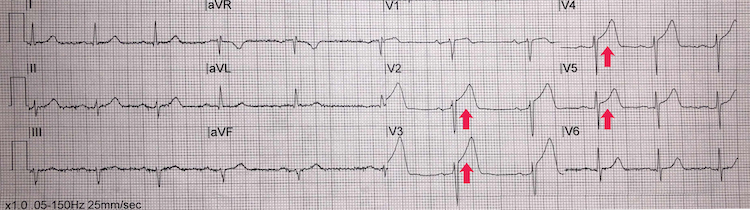
Anterolateral STEMI example I
From the personal collection of Dr Aung Myat (used with permission)
See this image in context in the following section/s:
ST-elevation myocardial infarction
Inferoposterior STEMI example II
From the personal collection of Dr Aung Myat (used with permission)
See this image in context in the following section/s:
ST-elevation myocardial infarction
Inferoposterolateral STEMI example III
From the personal collection of Dr Aung Myat (used with permission)
See this image in context in the following section/s:
ST-elevation myocardial infarction
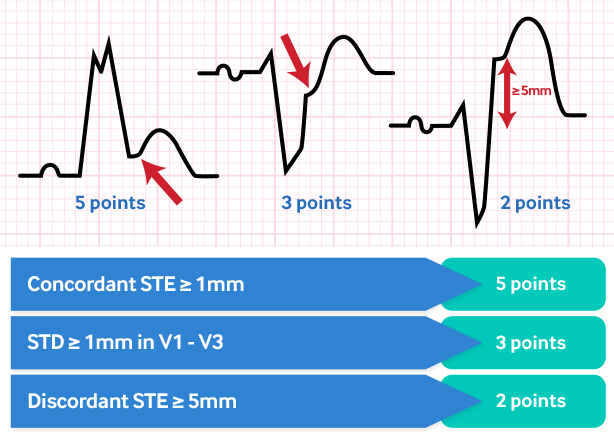
Sgarbossa criteria for MI in the presence of LBBB
Created by the BMJ Knowledge Centre
See this image in context in the following section/s:
ST-elevation myocardial infarction
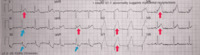
Left bundle branch block example II
From the personal collection of Dr Aung Myat (used with permission)
See this image in context in the following section/s:
ST-elevation myocardial infarction
Paced rhythm example I
From the personal collection of Dr Aung Myat (used with permission)
See this image in context in the following section/s:

ST-elevation myocardial infarction
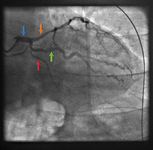
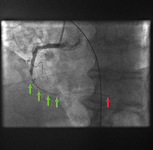
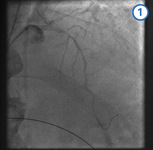
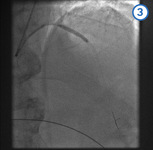
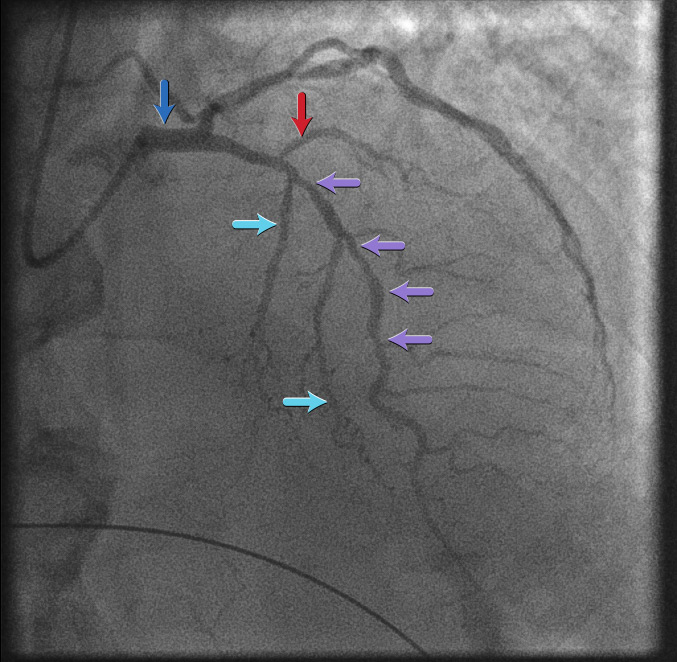
Right coronary artery: left anterior oblique view
From the personal collection of Dr Aung Myat (used with permission)
See this image in context in the following section/s:
ST-elevation myocardial infarction
Anterolateral STEMI example II
From the personal collection of Dr Aung Myat (used with permission)
See this image in context in the following section/s:
ST-elevation myocardial infarction
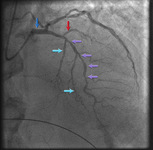
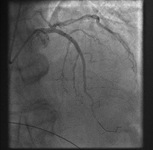
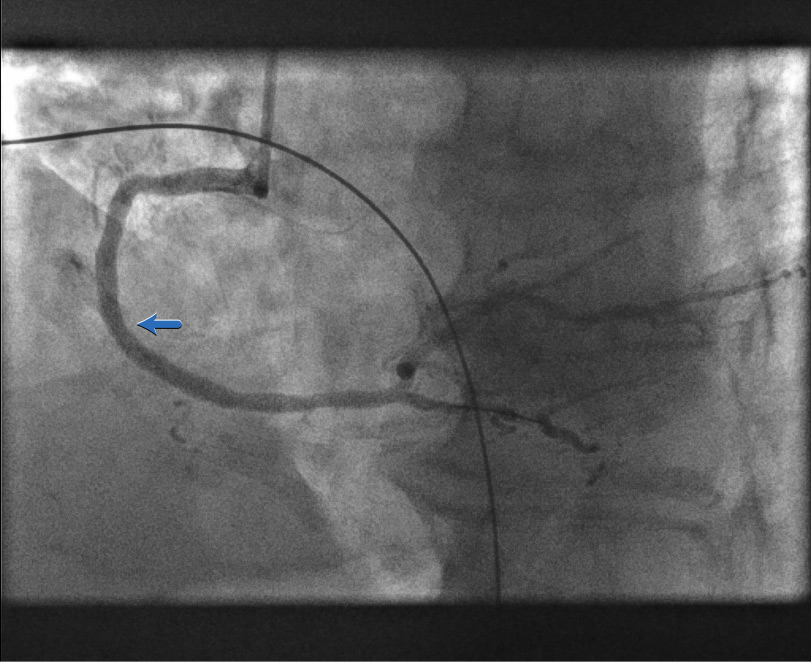
Left main coronary artery: posterior anterior cranial view
From the personal collection of Dr Aung Myat (used with permission)
See this image in context in the following section/s:
ST-elevation myocardial infarction
After stent deployment
From the personal collection of Dr Aung Myat (used with permission)
See this image in context in the following section/s:
ST-elevation myocardial infarction
Left anterior descending artery pre-dilatation image 1
From the personal collection of Dr Aung Myat (used with permission)
See this image in context in the following section/s:
ST-elevation myocardial infarction
Left anterior descending artery pre-dilatation image 2
From the personal collection of Dr Aung Myat (used with permission)
See this image in context in the following section/s:
ST-elevation myocardial infarction
12-lead ECG placement
Created by Npatchett (own work) [CC BY-SA 4.0], via Wikimedia Commons
See this image in context in the following section/s:
ST-elevation myocardial infarction
Proximal LAD stent deployment image 1 - following the mid-LAD stent deployment the proximal vessel is pre-dilated
From the personal collection of Dr Aung Myat (used with permission)
See this image in context in the following section/s:
ST-elevation myocardial infarction
Anteroseptal STEMI example I
From the personal collection of Dr Aung Myat (used with permission)
See this image in context in the following section/s:
ST-elevation myocardial infarction
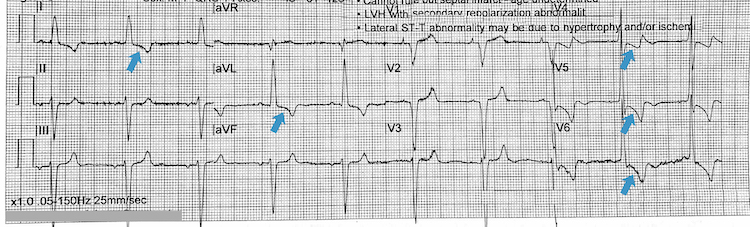
Left ventricular hypertrophy example I
From the personal collection of Dr Aung Myat (used with permission)
See this image in context in the following section/s:
ST-elevation myocardial infarction
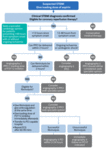
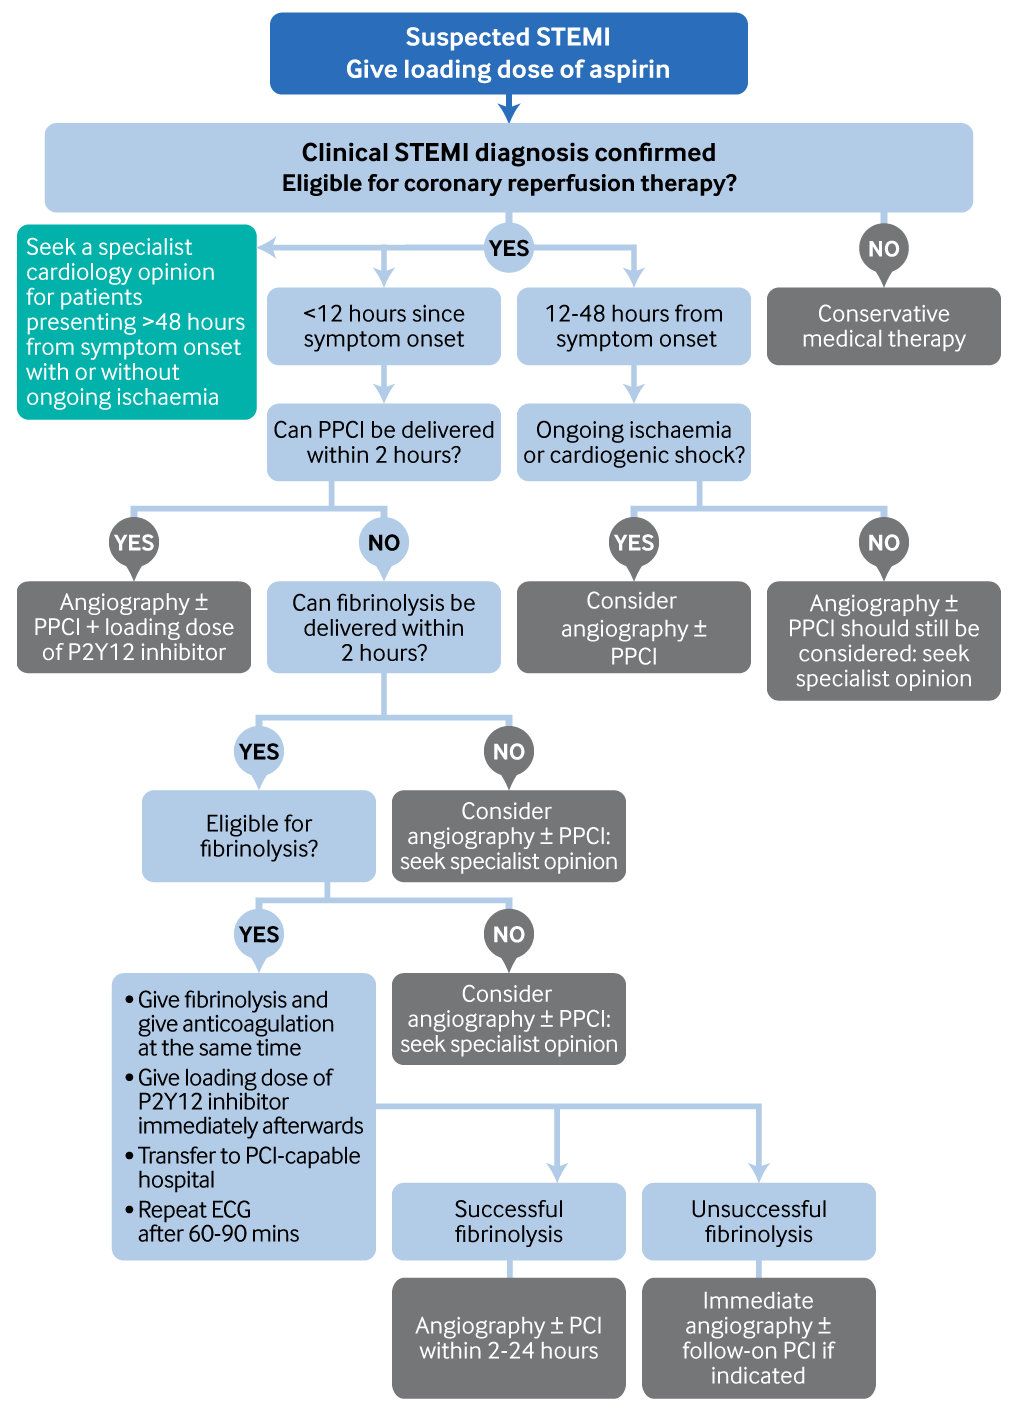
Selection of the most appropriate reperfusion strategy. PPCI, primary percutaneous coronary intervention
Created by the BMJ Knowledge Centre
See this image in context in the following section/s:
ST-elevation myocardial infarction
First balloon dilatation
From the personal collection of Dr Aung Myat (used with permission)
See this image in context in the following section/s:
ST-elevation myocardial infarction
Stent post-dilatation
From the personal collection of Dr Aung Myat (used with permission)
See this image in context in the following section/s:
ST-elevation myocardial infarction
Inferior STEMI example III
From the personal collection of Dr Aung Myat (used with permission)
See this image in context in the following section/s:
ST-elevation myocardial infarction
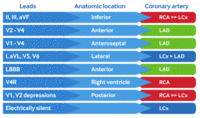
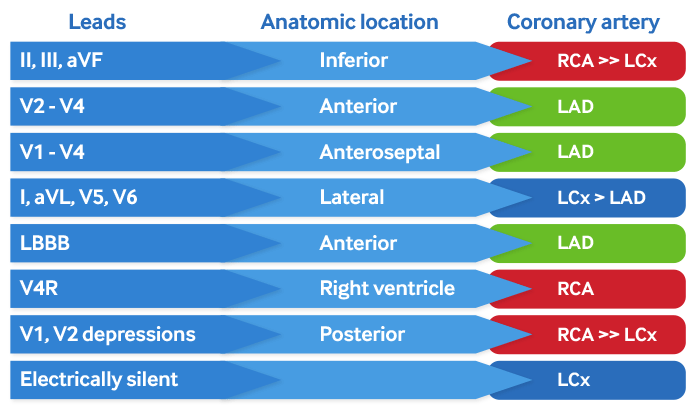
Coronary anatomy and ECG leads table
Created by the BMJ Knowledge Centre
See this image in context in the following section/s:

ST-elevation myocardial infarction
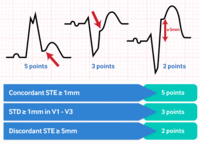
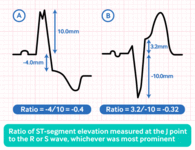
ST/S ratio under the modified Sgarbossa criteria
Created by the BMJ Knowledge Centre
See this image in context in the following section/s:
ST-elevation myocardial infarction
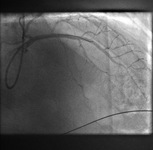
Left main coronary artery: right anterior oblique view
From the personal collection of Dr Aung Myat (used with permission)
See this image in context in the following section/s:
ST-elevation myocardial infarction
Inferoposterolateral STEMI example II
From the personal collection of Dr Aung Myat (used with permission)
See this image in context in the following section/s:
Use of this content is subject to our disclaimer